Saturday, July 27, 2013

Summer peach and kale salad

Have you noticed how unbelievably delicious peaches are right now? I cannot get enough of them! In my breakfast smoothies, as a snack on the go, or sliced with mango and berries for a healthy dessert...I seriously have been eating peaches multiple times a day for the past few weeks.  Today was no different.  For lunch I whipped up my own version of this salad from Rawmazing.  The ingredients are simple and fresh and perfect for a light summer day.  Enjoy!

Ingredients:

-Kale, washed & torn into bite sized pieces
-Sweet onion, sliced thin
-Fresh peaches, cubed
-Raw almonds, roughly chopped
-Unsweetened shredded coconut

Dressing:

-2 T unrefined coconut oil
-1.5 T balsamic vinegar
-1 T maple syrup
-Dash of salt and pepper 

(I doubled this amount and it made enough for 3 large salads).


Shake the dressing ingredients together in a sealed container.

Massage a Tbsp or two of dressing into the kale leaves to soften them up. You won't need much-the coconut oil will go a long way once it warms up from the touch of your hands.

Toss with the peaches, onion, and almonds.  Sprinkle the unsweetened shredded coconut on top.

Dig in.

Note: This recipe is not E2-friendly due to the added coconut oil.  I really think it adds a ton of flavor, but if you wanted to omit it and use extra shredded coconut, you could!  You might just need to add something in place of the oil to cut the straight vinegar flavor.  Tahini, ground chickpeas and water, avocado...oh the possibilities!

Monday, July 22, 2013

Raw Fruit Pie

I really should call this my Raw Fruit Pie.v2, or Pie 2.0, because you may remember my first raw fruit pie post from way back when I first started this blog.  Well, my friend, Stacey, and I had a hankering for it again this weekend.  However, I decided to re-vamp it using a whole different mix of fresh fruit, just to see how it would turn out.

Holy. Moly. YUM.  This one blows the other one away by, like, a million.


Never have I had such a deliciously fresh dessert that is 100% plant-strong (and ssshhh....it is healthy for you!).  Hands down, this dessert takes the cake, er, pie, when it comes to yumminess.  Look at this ingredient list and tell me how you can possibly go wrong?  That's right, you can't.


Raspberries, blueberries, blackberries, kiwi and mango.  Rinse and slice 'em.


Dried, pitted dates, walnuts, cashews, and almonds.  Splash of pure vanilla extract.  Throw 'em in a food processor.


Pulse until you get a grainy consistency.


Press the mixture into a pie pan.  It will be sticky and fun, so just go with it.


Layer the mango first, then the kiwi (this is me just halfway through the kiwi, so go ahead and do a full layer across).


Puree the raspberries (fresh or frozen work just fine since you're pureeing them.  All other fruits must be fresh, though.).  Pour on top of the fruit layers.


Spread evenly with a spatula.


Top with a pretty design of more fresh sliced mango, kiwi, blackberries, and blueberries.


Chill in the fridge for at least an hour.  (I waited overnight, which was tough!) Slice into pie slices and dig in!

I shared this pie with some friends for lunch on a lazy Sunday afternoon. They were absolutely in love with it!  Now I may be called upon to make this regularly for our dinners and get-togethers, for which I will happily oblige (selfishly so I can eat it more often!).  This crowd-pleaser is a keeper!

P.S.  For 8 servings, the nutritional info is as follows (according to MyFitnessPal):

Calories: 220
Carbs: 32g
Sugar: 22g
Fat: 9g (Saturated fat: 1g)
Protein: 5g
Fiber: 5g

Friday, July 19, 2013

Update on Fundraising for LLS

Wow!!  I cannot thank everyone enough for your support so far!  I have already raised over $1,500 to benefit the Leukemia and Lymphoma Society and I am so excited to run the Nike Women's half marathon to support such a great cause.  I will be proud to run in honor of the several victims and survivors who have touched my friends' lives, and to promote the cause to bring much needed funds for research and treatment to fight (and win!) against blood cancers here in Louisiana.

Thanks for your support so far!  Here's to the next $1,500...I'm already well on my way towards my goal.  Tell your friends and family, too!  Help get me to $3,600 by August 5th!

Click here to donate!  Or check out the widget on the top right corner of the blog.

Much love.

Spring Rolls from "My Beef With Meat"

When I saw this recipe in my inbox from Rip Esselstyn at Engine 2, I knew immediately that I had to try them.  I called a friend to come over and we made a night of it.  I just love the freshness of spring rolls.  The crunch of the bean sprouts, the crispness of the lettuce and carrots, the clean sensation of fresh basil, cilantro and mint....you really just can't get any better than that. Add a side of homemade almond butter dipping sauce, and you're in for a satisfying meal!  Yes, this recipe makes enough for multiple meals.  Spring rolls--they aren't just for appetizers anymore!


Thai Spring Rolls from Rip Esselstyn's "My Beef With Meat" (image copied from email):


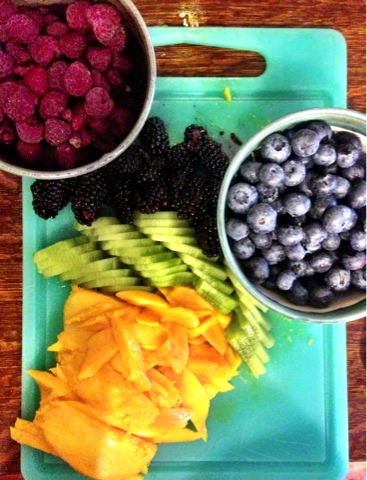
The only alterations we made were to omit the cucumbers (only because I did not have any--I have a few babies on my vines in my garden for next time, though!), and we sauteed the bok choy with a little garlic and Bragg's Liquid Aminos.


Then we laid out our assembly line and commenced with the assembling.  The first one my friend made was a behemoth....literally it was like two spring rolls in one!  We laughed, then decided to make them smaller from there on out :).  Below you will see the rice paper, rice noodles, bean sprouts, Thai mint (all from our awesome Asian market, Hong Kong Market), and romaine lettuce, carrots, and cilantro.


The process was super easy! Look.

Step one: soak the rice paper until it is pliable, then lay it out on a flat surface.

Step two: layer some noodles and veggies in a line down the center of the paper, leaving space at either end.


Keep layering until all fresh veggies are in there.  I like to have the greens on the top and bottom (the parts that touch the wrapper) in order to keep it smooth and prevent the sprouts or a carrot from piercing the paper when you roll it.


Step three:  fold in the outer sides (sorry for the blurry photo...just consider this an action shot).


Step four: once the sides are folded in, pull one remaining side all the way over, then start to roll up, keeping it pretty tight.


The rice paper will stick to itself once rolled up, and you'll have a finished spring roll looking as lovely as any you will find in a restaurant.  Well, almost :)


Look how many we made!  We came out with 11, but if you count the behemoth (see the one on the far right), it's really more like 12.


I ate three for two separate lunches on the go....so good!


Sadly I do not have a photo of our almond butter dipping sauce, nor can I give you exact measurements for how to make it.  My friend made it ahead of time and just used her creativity to make it up as she went.  That is often how the best foods are made!  I, at least, can share the ingredients with you and you can play around with it:

-fresh ground smooth almond butter
-balsamic vinegar
-apple cider vinegar
-tamari
-black pepper

This sauce was better than the peanut sauce that usually accompanies spring rolls, and that is saying something.  Thai peanut sauce is one of my most favorite things....second only to this almond sauce, now!  

Thanks to Rip's email for sharing this recipe from My Beef With Meat.  I can't wait to add these to my regular rotation for fresh, healthy meals on the go!

Thursday, July 11, 2013

Getting back on track--you can help!

I am back on track after an indulgent 4th of July Holiday with two quick health-restoring updates for you (yes, all 3 of you).

1.  I signed up with the Leukemia and Lymphoma Society's Team in Training program to train to run the Nike Women's Half Marathon in San Francisco in October!  Woohoo, I am so excited.  If you are able to donate any little bit, or know someone who will, please click on the link below (you can also click the widget on the right side of my blog).  What better way to help me get off my butt and run while supporting the fight against cancer??

Send Lisa to San Francisco and Help Save Lives!!

Check out more about the Leukemia and Lymphoma Society and Team in Training, too (just be sure to donate through my personal link above so I'll see that you get credit towards my goal!).

And....

2.  My friends and I are doing a 3 week cleanse, based on the Clean Program.  However, we are NOT doing any of the supplements because, well, ew.  Instead, we are just using the meal plan for the Dos and Don'ts for what types of foods we can eat--but the catch is that we are doing smoothies for breakfast and dinner, with our only solid meal being for lunch.  A snack in between is okay, too.

This is generally how I eat anyway--whole, plant-based foods, with the exception of no nightshades (eggplant, tomato, etc.), no wheat products, no caffeine, and no alcohol.  In order to push myself a little bit more, I am aiming to go 85/15 raw.  The 15% will be things like legumes, flax seed, and the occasional oven baked portobello mushroom.

So here's to my first smoothie on Day 1 (Monday).  Wish me luck!


Water, unsweetened almond milk, frozen blueberries, blackberries, and peaches, half an avocado, ground flax seed, and tons of spinach and baby kale


Cheers!!

Wednesday, July 10, 2013

Tunica Falls, Mississippi

Hey, y'all!  So, who knew that within a 2 1/2 hour drive of the bustling city of New Orleans, you could find peaceful wilderness with creeks, rocky hills, and waterfalls???  Yeah, me either!  But it's true, folks.  This lovely place will trick you into thinking you are no longer in the South.  It is called Tunica Falls and it is not to be missed.

A view from the top

A view from below


See?  I told you.  You don't feel like you're in Mississippi!  I love it.  Can't wait to go back!  This trip was a quick one, as we had an adorable trooper of a 2 year old with us.  Next time, we plan to go camp the night before then hike the full trail the next day, which is a pretty full day's length.  

Have you found any hidden gems that are off the beaten path?  Tell us about it!


Sunday, June 23, 2013

Wichita-wesome, Kansas

Who knew? Wichita, KS, the "air capital of the world" (due to the high concentration of aviation business here), has more than just Wichita State basketball, cattle, and Wizard of Oz memorabilia. On a recent visit for a consulting gig, I discovered a few hidden gems in this quiet sleeper town.  And (gasp!) everywhere I went I found plant-strong meals!

With limited time for food and exploration due to a heavy work schedule, I was apprehensive about being able to actually eat healthy food.  I prepared myself for a week full of granola bars, carrot sticks, and iceberg lettuce salads and I must say I was more than pleasantly surprised with what we stumbled upon.  In no particular order, here are my favorites:


This place came highly recommended as a "can't miss" lunch spot from several locals.  The menu clearly labels vegan, vegetarian, and gluten-free options, and there were multiple items to choose from (sorry, other guys.  Having a single veg option does not cut it!). I had a cold Thai mango and basil soup and cucumber, melon, and mint salad:


The soup was absolutely delicious! I am not usually a fan of cold soups but I'll eat anything with the word combo of Thai+basil+mango.  After I slurped up my bowl (hopefully not embarrassingly fast in front of my new colleagues) I was tempted to order more.  It was that.good.

The salad was light and refreshing and just made me happy to be sitting outside, enjoying the weather surrounded by cute patio decor.


Another fave was Il Vicino, and I loved it because they had a gluten-free crust option, and happily subbed spinach for the cheese on my veggie-loaded pizza, without looking at me as if I had a second head sprouting out of my shoulders. I also got a spinach salad with roasted peppers, hold the goat cheese, and ate every bite.   Many thanks, Il Vicino!  


I mean, seriously? Who would miss the cheese on this thin crust, fire-oven cooked, veggie and nutrient-packed pizza topped with mushrooms, artichokes, olives, fresh tomatoes, spinach, red onion, and eggplant?  Nobody, that's who :).

And last favorite of the trip was at Larkspur, surprisingly.  This is surprising because they are a steak and seafood spot with not a single vegan entree option on the menu.  How does one order a plant strong meal in such a place, you ask?  Well, you ask the server to ask the chef to cook every vegetable in the back and get creative with it.  And that's exactly what happened and it was the envy of the table:


It came out smelling of fresh vegetables, herbs, and that awesome summer smell of the grill.  I definitely heard a few oohs and aahs from the table (not to mention another server came over later to say how delicious my meal looked and how excited the chef was to make it).

It was an extravaganza of grilled squash, red onion, asparagus, green beans and portobello mushrooms topped with a house-made roasted tomato and almond sauce.  I ate every last bite!

This example is testament to the fact that you really can get a plant-strong meal at a restaurant if you simply ask :). 

If you ever find yourself in Wichita, hit up these joints and you won't be disappointed!

(I promise my next post will be a recipe or at least a glimpse into my next cooking adventure.  After all this traveling recently I have a few weeks of relaxing at home ahead of me so you can count on me experimenting with some new ideas!)  So for now, peace!


Tuesday, June 4, 2013

Some fava beans and a not-so-nice chianti...

What the heck are these things and what do I do them?!


I asked myself these questions when I picked up these "beauties" from Hollygrove Market.  Fava beans, my friends.  Fava beans.  After a bit of Googling, I figured out how to cook them.  If you do not know, there are two layers that need to be removed, so I am glad I looked it up before just trying to wing it!

First, split open the pod and scoop out the big beans.


Then, blanch them for 3 minutes in boiling water.  Drain.  Put into an ice bath to cool.  When cool enough to touch, peel off the next layer to reveal the edible beans.


Then simply saute with some chopped tomato, minced garlic, and a dash of red pepper flakes and voila!  A delicious accompaniment to a nice (or, in my case, a so-so) chianti.


Fun fava fact: they are jam packed with protein and fiber, so just 1/2 cup has 9 grams of protein and 6 grams of fiber.  This will fill you up for sure :)


Friday, May 31, 2013

Chickpea peanut butter chocolate chip cookies! (and a look into homemade kombucha)

Healthy cookies are never as good as real cookies, right?

Wrong.

While these will not fool you into thinking you are eating real cookies, they will satisfy you as a sweet treat that rivals those other unhealthy versions (and, psst....they are plant-strong and gluten-free!).

On a recent visit to Seattle, my friend introduced me to these and we ate them all within just a few days (and we may or may not have doubled the recipe.  Just sayin'....).

Recipe here at TexanErin

We doubled the recipe and followed it almost exactly, using agave nectar and dark chocolate chips.  Ours did not hold up together as well as the ones in the pictures on TexanErin, so I think next time I would add one more smidge of peanut butter to hold them together better.

These are certainly not low-calorie, but at least you can feel good about eating them since you are getting the benefit of the nutritious ingredients rather than eating empty calories in refined flour, sugar, and butter!  Blech!

Note:  I agree with TexanErin when she says that a regular blender will not work.  It won't....we tried it.  Our only alternative was an immersion blender, which worked to some extent.  It took forever!  So really:  use a food processor!


You basically just blend up all of the ingredients (except chocolate chips), stir in the chocolate chips, then form little balls with your fingers:


Bake at 350 degrees F for 10-12 minutes (while you wait impatiently.).  When ready, they will not look much different, maybe a little drier.  Remove them from the pan to cool, and eat!


Now that your mouth is watering over these attractive, sweet treats, let me warn you that this next random tidbit is the opposite of attractive and sweet.  While in Seattle, I also learned how to brew your own kombucha and it is not.pretty.  Easy, yes.  Pretty, no.

You basically just brew tea with distilled water, add sugar then let it cool, then add a scoby to it and let it sit in a glass container covered with a cloth for about a week.  The scoby is one heck of a fungus and it STINKS when it is not actively submerged in the kombucha.  Check it out:


The scoby is a fungus that ferments the tea into kombucha.  Each time you make a batch of kombucha, a new scoby grows (see the layers below).  This is often how people begin making kombucha, by obtaining a scoby from a friend who has brewed it before.


You have to let it ferment in a cool, dry area for a week or so, so sadly I was unable to taste the final product.  I have heard reports that it turned out quite delicious.  Here are a few more sites with more info, if you are interested:

http://www.thekitchn.com/how-to-make-kombucha-tea-at-home-173858

http://www.culturesforhealth.com/make-kombucha

Yes, these are the types of things that my Seattle friends do on a regular night!  I love them :)